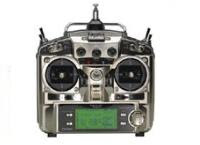
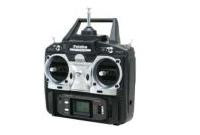
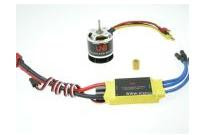
Alright, you've built your model, you've programmed your radio, and tomorrow is the big day. You're going to fly your heli for the first time. It's normal to be a bit nervous, you've spent a lot of money on your new heli, and a lot of time building it. OR perhaps you bought a ready to fly model, no matter it's new, and you spent your hard earned money on it! Here's some tips to have success with your first flight!
1: Charge those batteries!
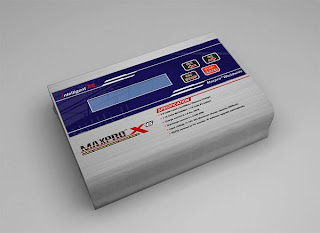
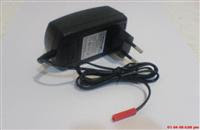
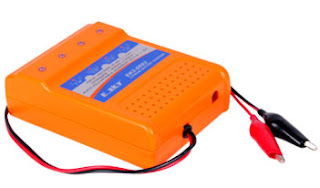
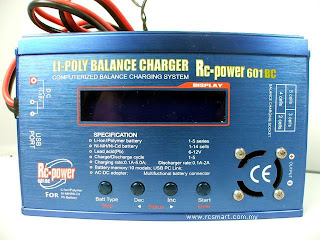
That includes your receiver pack, and your transmitter. Whether your model is electric or nitro, it is really important to have your batteries fully charged. Nothing's worse than watching the day pass you by when you sit and charge! It's a great idea to charge your batteries the night before, that way you don't have to spend a bunch of time waiting at the field for them to charge, plus most transmitter and receiver batteries do much better with a slow overnight charge.
2: Pack up and don't forget stuff!
While at the field you'll want a tool box with the tools you used to build your helicopter. Ideally, if you built your model perfectly you wouldn't need any tools, but you'll want them there just in case. Don't forget your Transmitter, Your glow igniter, your fuel, your fuel pump, your starter, and of course your Heli! It's also a good idea to bring the manual for your Heli, Transmitter, and gyro! Chances are you'll be doing some fine tuning and the manual may help. If you've never flown before, it would be a good idea to bring the training gear or rotopod.
3: Setup all your gear!
Pick a spot at the field where you can set all your gear, HeliProz recommends flying at a sanctioned AMA flying site, so be sure you follow the clubs procedures regarding your frequency, some clubs still require you to pull a pin even if you're operating on 2.4GhZ. If there are any knowledgeable heli guys at the field already, see if any of them would be willing to help you out with your first flights. Most people are happy to help a beginner, as long as you don't request that they fix a bunch of stuff on your heli. WIth their help, check the basics, a range check should be performed each day before flying. Check that your servos are all operating correctly, and that the batteries are still charged.
4: Perform a pre-flight inspection!
Perform a Pre-Flight inspection of your model before you start it. Check your ball links, screws, nuts, blades, and all moving parts on your Heli. The more careful you perform the pre-flight inspection, the better chance you have of catching a problem before it causes a crash!
5: Turn on your equipment!
Turn on your transmitter, then the model, and start your heli, or if it's electric plug in the battery. Carry out your helicopter to the line watching to be careful that you're not getting in the way of any other modelers. Spool it up, and do your thing, fly circuits, or hover. Remember to be safe, and follow the established club rules. In most clubs safety is a BIG deal, and it should be a big deal to you too. When your helicopter is nearly out of fuel, or battery becomes low, land safely. Stop the engine, and when it is safe, meaning no other models are buzzing around your landed model, quickly walk out and retrieve your model.
6: Post flight inspection!
Return to the bench where you started your model, turn off the receiver, and then turn off the transmitter. If you grabbed a frequency pin, put it back so anyone waiting to use your frequency has a chance to fly. REMEMBER, DO NOT turn on your transmitter if you don't have the pin! Now is a great time to perform a post-flight inspection. Similar to the pre-flight inspection, check for worn or loose parts. It's a good idea to perform a pre-flight check, before every flight, and a post-flight inspection, after every flight. Nothing's worse than crashing the model because of a loose or worn out part!
7: About the batteries!
Make sure you keep an eye on the condition of your receiver and transmitter battery. You will probably get two to five flights off of your receiver battery depending on the capacity. If you have a field/fast charger, you can charge and continue to fly. Otherwise, you're done for the day!
There’s a lot of choices and we’re here to help. R/C Helicopters can be tough to get started in, but it is also one of the most rewarding, yet challenging hobbies you can have. With today’s modern electronics and well designed kits, it has never been easier to get into this exciting hobby.
The absolute best way to get started is with a simulator. There are several on the market, our favorite is the Real Flight G4. It is a window’s based program that comes with an interlink transmitter that simply plugs into the USB port on your computer. You can check it out at www.realflight.com. With this simulator, you can literally learn to fly (and crash) many different models of r/c helicopters, as well as airplanes and sailplanes. It’s about $200, which may seem expensive at first, but when you realize that each crash on your r/c model could cost $50 or more, the value becomes much more apparent.
Nitro or Electric?
Now you’ll have to decide whether you like nitro or electric. There are some pre-built ready to fly models available from E-Flite. They include everything needed to fly the model. They sell for around $200, and can be a lot of fun. The E-Flite Blade CX2 is one that I recommend if you have never flown an r/c model and are not really sure if are going to enjoy the hobby. Besides learning, the Blade CX2 is a lot of fun in the winter time, when it’s too cold to go outside. It can literally be flown in the living room. It is a coaxial design, which is extremely stable, and simple. It is not really a 3d helicopter, meaning it is not capable of aerobatics. E-Flite also sells the Blade CP, and the Blade CP pro. These models are also available as ready to fly models. They are more conventional in design, meaning they have a main rotor, and a tail rotor. They are not easy to fly, and I usually don’t recommend them as a first model, unless you’ve been practicing with a simulator.
Electric micro helicopters such as the Trex, can be a great first model. These models are typically available as kits, or arf’s (almost ready to fly). Just so you know, an ARF means that the airframe is mostly built, whereas a kit is completely unbuilt, and you will build it. Or if you like, you can call HeliProz and the guys there are usually willing to build a model for you (for a fee of course) though it isn’t really a service that HeliProz provides. In the small electric catergory, this sometimes includes a motor and an electronic speed control. You’ll also need a helicopter transmitter, servos, gyro, battery pack(s) and charger. You’ll need some basic tools to build your model like screwdrivers, and allen wrenches. HeliProz also sells tools that are perfect for building your model. You can expect to spend $800 to $1200 on a model of this size.
Nitro models are another choice. Don’t let the larger size and Internal Combustion engine scare you away. They are easier to work on and build due to their size, and are usually much more stable than the smaller electric models. Some examples are the Thunder Tiger Raptor, Compass Knight, and Hirobo Sceadu Evolution. Nitro models are available in several sizes. 30, 50, 60, and 90 size. The 30 and 50 size are nearly the same size, usually utilizing a nearly identical airframe, and the 60 and 90 size utilize a nearly identical size airframe. If you ask us, a 50 size model is about the perfect size for learning, and when you’re a better pilot, you can do all the 3d aerobatics you can imagine. If budget is a concern, a 30 size model is a decent choice, though it won’t have quite the power for hardcore 3d aerobatics. If you’re not interested in 3d aerobatics, then a 30 is the most economical choice. Some examples of 30’s are the Thunder Tiger Raptor 30, and the Kyosho Caliber 4, and the Sceadu Evolution 30. In a 30, you can usually get away with using cheaper servos, again keeping the costs down. A 60 size heli used to be the largest size of r/c helicopter, and is still a good choice if extreme 3d aerobatics are not what you’re looking to do. They are more stable than the 30, and 50 size models, although only a few choices for 60’s remain. The Thunder Tiger Raptor 60 is one and so is the Miniature Aircraft Fury Expert. The top class of R/C heli’s is the 90 class. Some examples are the Thunder Tiger Raptor 90, The Hirobo Freya Evolution 90, the JR Vibe 90, and Several models from Miniature Aircraft. We don’t usually recommend a 90 as a first helicopter, as they can be quite a bit more expensive than the other sizes, and can be unforgiving if crashed. They also tend to use a bit more fuel than the smaller sizes.
RC Helicopter Flying Tips
PART I: PROFILE
Important suggestions in order to learn to fly model helicopters fast, safe and without crashing every week:
1. Invite an experienced flyer to help you: Setting up a helicopter for the first time is not very easy. It is very unlikely that you will setup the helicopter correctly by yourself. A helicopter that has been setup properly flies much better and is more predictable! So it’s necessary for you to have an experienced flyer help you. He may give you additional hints and tips on learning and he may point you at certain mistakes you make, which may be very helpful.
2. Take small steps: Always take very small steps on the learning curve. If you take a big step, you may succeed, or you may crash. If you crash, you may be de-motivated, it will cost you money, it will make you less confident, you are grounded for some time and the worst it is dangero! Make sure that you learn a step thoroughly and in all directions before you take the next step. In the end you will learn faster if you take small steps becae you know the basics well and you will fly instead of repair.
3. Don't skip steps: There are of course numero ways to learn to fly a remotely controlled helicopter. However, if you follow the steps listed below, you will learn fast and with a minimum chance of crashing. The steps are chosen such that you always have learned the necessary steps before taking a new step.
4. e a proper RC Helicopter fly simulator: Having a proper simulator, which can be controlled by your Tx ( transmitter is necessary). It allows you to get acquainted to controlling an R/C helicopter and learn the needed reflexes.
PART II: FUNCATION
1) Learn about the basic theory of helicopter aerodynamics. This will help you to understand what is going on. Your instructor can learn about the controls and their interactions and the influence of wind on the model etc. Learn about when a helicopter stalls etc, this is very different from a plane!
2) Have your helicopter checked over thoroughly by your instructor for safety.
3) use your simulator to train your reflexes required for hovering the helicopter.
4) Setup a buddy lead between your TX and the TX of the instructor and make sure that both transmitters are setup properly. Here you can see the learning process on the buddy lead in action. Both transmitters are connected, and the instructor is ready to take over at any time.
5) Learn about the safety procedures on RC helicopter fly and the specific safety procedures at the field you are going to fly.
6) Make sure that you have your training gear connected properly.
PART III: PRACTICE & PROGRESS
Make sure you practice until you are confident in a step before you move on to the next step.
Make sure that you have your training gear connected properly.
Make sure that your instructorknows when you get in to trouble.
Learning Cyclic Control:
Step1) Your instructor will check the helicopter controls, he will spool it up and check the controls with a spooled up helicopter. If all is well, he will test fly the helicopter to ensure that everything is operating as expected. Yes, this is thrilling; you have Just witnessed your helicopter actually fly.
Step 2) Your instructor will demonstrate what a sliding helicopter is. using your training gear it will be possible to slowly land the helicopter while it still has significant forward, backward or sideways speed.
Step 3) Position the helicopter with the nose in the wind. You should stand 5m away behind the helicopter, and 1m to the left of it. Rehearse in your mind what you are going to do (try to make the helicopter stay put at one position). Rehearse what the controls and their interactions are going to be.
Step 4) Now you are in control of the cyclic and your instructor will lift the helicopter to a save height of 0.1m. Exercise only very small control inputs. While trying to make the helicopter stay put, the landing gear will now and then touch the ground, but this will be no problem. Once you can control the helicopter so it stays in one place, it will no longer touch the ground. Your instructor will lift the helicopter to a height of 1m. This will need a bit of time to get ed to. Yes, you are flying a helicopter!
Step 5) Practice to move the helicopter sideways 1m, stop in a hover, and come back again. Practice this in both directions. You will develop proper feel for controlling the cyclic.
Step 6) Practice to move the helicopter forwards 1m, stop in a hover, and come back again.
Then, you mastered the basic controls on the right stick.
Learning Collective and Rudder Control:
Step 1) Position the helicopter with the nose in the wind. You should stand 5m away behind the helicopter, and 1m to the left of it. Rehearse in your mind what you are going to do (try to gently lift the helicopter 10cm of the ground and put it down again). Rehearse what the controls and their interactions are going to be. Remember that you mt keep calm when you slam down the helicopter and donot slam it down in a hurry.
Step 2) Lift the helicopter slowly of the ground up to 10cm. Hold the pitch control for a couple of seconds. Decrease pitch slowly and set it down again. You will get confident in your instructor in keeping the helicopter at one spot. Try to be very precise on the stick so that you do not touch the rudder. The helicopter will not stay at one height due to the wind effects.
Step 3) Lift the helicopter slowly to an height of 1m. Get comfortable with this height, and practice to set it down slowly and gently. Try to learn to keep the helicopter at a constant height of 1m. If you feel uncomfortable landing the helicopter, let the instructor land the helicopter until you are ready for it.
Step 4) Lift the helicopter to a height of 1m. Keep it steady. Now slowly rotate the nose of the helicopter left, back again, right, and back again. The maximum rotation is about 20 degrees. Get comfortable in controlling the rudder.
Step 5) Lift the helicopter slowly to an height of 1m. How does a controlled ascent to 2m, back to 1m etc? Practice to get a very controlled height.
Step 6) Lift the helicopter to a height of 1m. Your instructor will move the helicopter sideways, forwards and backwards (1m). Try to keep the helicopter at a constant height of 1m.
Step 7) Same as above, now the instructor moves the helicopter in all directions up to a distance of 5m.
After these steps, you mastered the basic control of the pitch/throttle and the rudder.
Learning to Control Both Sticks:
Step 1) Position the helicopter with the nose in the wind. You should stand 5m away behind the helicopter, and 1m to the left of it. Rehearse in your mind what you are going to do (try to make the helicopter stay at a minimal height of 1m). Rehearse what the controls and their interactions are going to be.
Step 2) Be prepared for the helicopter to drift to the left (with a right hand rotating main rotor). It will do that! Promptly lift the helicopter to a height of 1m. Don't try to control the cyclic until it is of the ground! Don't hover below 1m, make sure that the liftoff is swiftly. Catch the left drift of the helicopter. Practice until the helicopter stays put at one place and you are in full control.
Step 3) Practice a gentle decent from 1m and a gentle touch down. Practice this until you can land the helicopter with little to no sideways movement and a gentle descent. From here on, you always try to land the helicopter as if there is no training gear attached (gently with no sideways movement).
Step 4) Practice to move the helicopter sideways 1m, stop in a hover, and come back again. Practice this in both directions. Take care of the control interaction, be aware of the wind effects. You will develop proper feel for controlling the cyclic and the pitch combination. Extend this slowly to a sideways movement of 5m.
Step 5) Practice to move the helicopter forwards 1m, stop in a hover, and come back again. Extend this slowly to a forward and backward movement of 5m. Take care of the control interaction; be aware of the wind effects. Practice this until you can make forward, backward and sideways movement at a constant height.
Step 6) Lift the helicopter to a height of 1m. Keep it steady. Now slowly rotate the nose of the helicopter left, back again, right, and back again. The maximum rotation is about 20 degrees. Get comfortable in controlling the rudder and keeping the helicopter at one spot with a constant altitude.
After finished these steps, you have managed the first hovering steps.
The Hovering trail like "M":
Step 1) Position the helicopter with the nose in the wind. You should stand 5m away behind the helicopter, and 1m to the left of it. Rehearse in your mind what you are going to do (try diagonal movements and finally make the "M" maneuver at a constant height of 1m). Rehearse what the controls and their interactions are going to be.
Step 2) Bring the helicopter in a stable hover. Move the helicopter 5m to the right of you and make it stop. From this point, move the helicopter 5 m forwards and make it stop. You are looking at the helicopter with a familiar angle, Just a bit further away. Make sure you can hold it there in a stable hover.
Step 3) Diagonally move the helicopter backwards and to the left until it is again in front of you (5m in front of you, 1m to the right). Practice this triangle until you feel comfortable.
Step 4) Now we are going to practice the left-hand side. Again, start in front of you. Move the helicopter 5m to the left and make it stop (near left corner). Move the helicopter 5m forward and get it in a stable hover. Diagonally move the helicopter backwards and to the right until it is again in front of you (5m in front of you, 1m to the right). Practice this triangle until you feel comfortable.
Step 5) Now repeat the steps above, but this time you extend the diagonal sections. So you are going to move the helicopter diagonally from the far right corner directly to the near left corner. From here move the helicopter to the far left corner, and then diagonally to the near right corner. From here to the far right corner etc. Always hover at the corners first so that errors do not get accumulated.
Step 6) Now we are going to practice the triangle in the other direction. Start with the helicopter in front of you move diagonally to the far right corner, back again to the near right corner and back again in front of you. Also practice this on the left hand side, with the diagonal movement away from you to the far left corner.
Step 7) Extend the diagonal movements. Start in front of you, move the helicopter to the near right corner, from here move the helicopter to the far left corner and back to the near left corner. From there move it in one diagonal to the far right corner and back to the near right corner.
Step 8) Lift the helicopter in front of you. Move the helicopter to the far right corner. From there move it diagonally back in front of you, but now at a distance of 7.5M in front of you (half way or middle point of the "M"). From that position move the helicopter to the far left corner and back to the middle point.
Step 9) Connect the exercises above until you make a nice "M" with stopping at each corner. Practice the "M" in both directions. Now reduce the stop time until you have a nice and smooth continuo "M". Practice them in both directions.
After tried the steps above, you managed an essential hovering skill that will help you through your future leaning steps.
Landing and Takeoff
Step 1) Position the helicopter with the nose in the wind. You should stand 5m away behind the helicopter, and 1m to the left of it. Rehearse in your mind what you are going to do (try to make the helicopter land as if there is no training gear). Rehearse what the controls and their interactions are going to be.
Step 2) Lift the helicopter to a height of 1m. Now land the helicopter with absolute no sideways movement. Furthermore, the landing should be very soft. Notice that without a training gear the helicopter tips over very easy, and a rough landing will break the landing gear.
Step 3) Put a marker in front of you and practice perfect landings with no sideways movement and a very gentle descent over and over again on top of the marker. Having the "landing gear square" over the marker is good enough. Don't foc on the landing gear or the marker; try to look at the overall picture.
Step 4) Move the helicopter to the far right corner, and practice a gentle and stable landing.
Step 5) Move the helicopter to the far left corner, and practice a gentle and stable landing.
Step 6) Take off the training gear. The longer the training gear stays on, the more difficult it will be to remove it. Furthermore, you might be using the training gear for deducting the attitude of the helicopter. This is not a good thing, as it is not going to be there in the future. A Raptor 30 with the training gear still attached.
Step 7) Lift the helicopter promptly to a height of 1m. Don't touch the cyclic before the helicopter is actually airborne! Get comfortable hovering the helicopter without the training gear. If you control the cyclic before the helicopter is actually airborne, the helicopter is likely to tip over.
Step 8) Move the helicopter sideways 5m, stop, and back again in both directions. You now get ed to the controls of the helicopter without the training gear. Move the helicopter forwards 5m, stop, and back again. You now get ed to the controls of the helicopter in the forward direction without the training gear.
Step 9) Descent the helicopter to 0.1m and back again to 1m. Get comfortable of the semi landing of your helicopter without the landing gear. Now you are going to do your first actual landing without the training gear. Rehearse your escape first! Now while landing the helicopter, keep reminding yourself to ph the left stick if you are not comfortable. Don't land the helicopter if it moves sideways, abort the landing in that case. Remind yourself that you can do this since you can make a perfect landing with the training gear attached.
Step 9) You did your first landing without a training gear! Lift the helicopter to a height of 1m and land the helicopter. Keep practicing this until you can swiftly and confidently land your helicopter.
Step 10) Practice to land the helicopter at the far right and the near right corners. Keep practicing this until you can swiftly and confidently land your helicopter. Now practice both the far left and the near left corners.
Step 11) Practice a perfect landing in front of you "on top" of the marker. Landing within 0.3m is good enough for now.
After finished the steps above, you managed to take off, hover, move around and land your helicopter safely.
PART IV: SKILLS & DEVELOPMENT
Make sure you practice until you are confident in a step before you move on to the next step.
Make sure that you have your training gear connected properly.
Make sure your instructor knows when you get in to trouble.
The wind mt be gentle.
Tail in the Wind:
Step 1) This is an easy one with nowadays gyro's. Rehearse what the wind effects on the tail will be in the hover in relation with the pitch control. Put the helicopter in front of you with the nose in the wind. Lift of the helicopter and practice a comfortable hover and landing with the give wind. Make sure you get ed to the changed pitch range! The landings should be precise and comfortable with the new pitch range and the wind.
Step 2) Put the helicopter in front of you, but this time with the tail in the wind. Lift of the helicopter and practice a comfortable hover and landing with the tail in the wind.
Step 3) Practice moving the helicopter to the near right and near left corners and hovering at those corners. Practice to hover the helicopter at the far right and far left corners.
Step 4) Practice the hovering "M" in both directions with the tail in the wind.
Step 5) Hover the helicopter in front of you, and rotate the nose to the left, back again, to the right and back again. The rotation of the nose should not exceed 20 degrees or so.
Then, you managed an essential hovering skill with some wind.
Learning Sideways Wind:
Step 1) This is an easy one with nowadays gyro's. Rehearse what the wind effects on the tail will be in the hover in relation with the pitch control. Rehearse what the sideways wind will do with the attitude of the helicopter in a hover. Put the helicopter in front of you with the nose in the wind. Lift of the helicopter and practice a comfortable hover and landing with the give wind. Get ed to the wind of today.
Step 2) Put the helicopter in front of you, but this time with the wind coming in at the left side of the helicopter (with right hand rotating main blades). If your helicopter is rotating counter clockwise, you should start with the wind on the right side of the helicopter. Rehearse what the wind is going to do, and what you are going to do to counter the wind effect. Be aware of the effects of the wind on your pitch.
Step 3) Promptly lift the helicopter to a height of 1m, and try to catch the drift. If you don't succeed, your instructor will take over. Don't let the helicopter drop below 1m. Practice this until you can make the helicopter stay put in one position at one altitude. Note that you can always rotate the tail towards you and in the wind if the helicopter keeps drifting. You are then again hovering with the tail in the wind, which you already mastered.
Step 4) Slowly land the helicopter without any sideways movement. The left skid is likely going to touch the ground first, which is absolutely no issue! Practice this until you can comfortably takeoff and land the helicopter with the sideways wind.
Step 5) Now position the helicopter in front of you with the tail towards you, but with the wind coming in at the right side of the helicopter (clockwise rotation of main blades). Rehearse what will happen. The helicopter will tilt much more now. Practice Step 3 and Step 4 with the wind coming from the right.
Finished the steps above you learned to handle sideways wind without a problem.
Hovering Solo:
Step 1) Position the helicopter with the nose in the wind. Your instructor will stand next to you to give confidence and eful (vocal) help if necessary. Lift of the helicopter and hover it in front of you. Practice until you feel comfortable. Land the helicopter in a precise and gentle way.
Step 2) Practice all the Hovering "M" steps.
Step 3) Practice the Tail in the Wind steps.
Step 4) Practice the Sideways Wind steps.
Step 5) Your instructor will let you alone, he will put the nice bottle
of wine he finally got from you in his car.
Step 6) Practice Step 2 to Step 4 while you are completely on your own.
Now, you really mastered the basic skills to hover a helicopter.
Tail-in Circle:
Step 1) Put the helicopter in front of you and hover for a second so you get ed to the wind. Rotate the nose 20 degrees to the left and hover for some time like that. Rotate the nose 20 degrees to the right and hover for some time like that. This way you get comfortable again with the wind on the side of the helicopter.
Step 2) Position the helicopter with the tail in the wind, and put it in a stable hover. Now let the helicopter make the first 90 degrees of a counter clockwise tail in circle with a radi of 5m (with clockwise rotating main blades). The helicopter is hovering with the wind coming in on the left side of the helicopter. Slowly let the helicopter move back again to the starting position (90 degrees clockwise) until the wind is on the tail again.
Step 3) Position the helicopter with the tail in the wind, and put it in a stable hover. Now let the helicopter make the first 90 degrees of a clockwise tail in circle with a radi of 5m (with clockwise rotating main blades). The helicopter is hovering with the wind coming in on the right side of the helicopter. Slowly let the helicopter move back again to the starting position (90 degrees clockwise) until the wind is on the tail again. Note that the helicopter will need to bank a bit more now, get comfortable with this banking angle.
Step 4) Position the helicopter with the tail in the wind, and put it in a stable hover. Now let the helicopter make the first 180 degrees of a counter clockwise tail in circle with a radi of 5m (with clockwise rotating main blades). The helicopter is hovering with the nose in the wind. Slowly let the helicopter move back again to the starting position (180 degrees clockwise) until the wind is on the tail again.
Step 5) Position the helicopter with the tail in the wind, and put it in a stable hover. Now let the helicopter make the first 180 degrees of a clockwise tail in circle with a radi of 5m (with clockwise rotating main blades). The helicopter is hovering with the nose in the wind. Slowly let the helicopter move back again to the starting position (180 degrees clockwise) until the wind is on the tail again.
Step 6) Just put the steps above together, and you are doing a tail-in circle!
Step 7) Increase the radi of the circle to e.g. 10m. Practice the circles in both directions until they are circular with a constant speed and a constant height. Work up the speed of the circles so that a complete circle with a radi of 10 takes about 8 seconds or so on both directions.
Finished all the steps above and now you really mastered flying a helicopter with a gentle wind. Hope you enjoy yourself with your beloved helicopter!
Learn to Fly Airplanes
You can learn how to fly fast if you choose the right airplane and follow a few suggestions!
You can learn how to fly RC airplane instantly, avoid unnecessary damages and enjoy flying once you follow rules below. You don’t need an instructor if you choose the right airplane to start with.
1. Make clear how an airplane flies. Here’s how airplanes fly: When the wing moves forward the air lifts it. Too slow, no lift and it falls out of the air -- it stalls. So, it needs flying SPEED either from a motor and propeller, or by descending and gliding. The wing is lifting all the time it's moving forward -- whether it’s upside down, in a turn, inverted, or doing aerobatics -- there is always lift from the wing even though the lift might not be straight UP as it is in level fly. The airplane makes right or left turns by tilting in the direction of the turn so that some of the wing’s lift is angled partly to the left or right. To turn an airplane you tilt the wings with the ailerons or with the rudder in the direction you want to turn. To make the airplane go UP you give an UP command to the elevator. The elevator surface angles UP and the air that’s hitting it blows the tail DOWN and the nose UP. When the airplane goes UP it slows down. If it goes too slow the lift stops and the airplane falls -- stalls.
2. Choose an airplane that can fly all by itself without your controlling. Don’t pick a low-wing, aerobatic airplane. The best choices are slowflyers, parkflyers, or gliders that use electric motors for power. Gliders can glide straight ahead all by themselves (if they do not have a warped wing -- see below) without you doing any controlling from the radio transmitter. If you want to fly without an instructor these glider type airplanes will fly themselves while you are trying to figure out how to make them go some other direction. You need this stability while you learn how to fly. The second best choice is a non-glider (powered airplane) that has the wing on the top of the fuselage and which is advertised to be a good training airplane. Click here for true "beginner" airplanes.
3. Confirm that these following things are correct before each fly:
A. The balance point MT be where the airplane’s designer intended. Don’t be afraid to add lead weights to either the nose or the tail to make the airplane balance where it is supposed.
B. The wing mt not be warped,. Fasten the wing onto the airplane. Set the airplane on a table and walk off to the rear of it. Look back at the airplane from an eye position where you can see Just a bit of the BOTTOM of the entire wing. If you see MORE bottom wing surface on, let’s say, the left wing, then your airplane will tend to turn left even when you have the aileron or rudder control in neutral. Remove that warp before you try to fly the airplane.
C.The wing should have something called "washout""Washout", this is an intentional and desirable warp of the wing near each wing tip. ually this warp is done to the outer 20% of the wing toward each wing tip. From the rear of the airplane you should see a little more of the BOTTOM of the wing near both wing tips. Why is this "washout" good? It helps the outer parts of the wing continue flying straight ahead during the beginning of a stall. This means that your airplane will stall straight ahead instead of rolling over on its back or side when it stalls and that rolling over might be impossible to recover from.
4. Find a BIG flying field for your first flys. Don't try to fly in your street even if the airplane is capable of flying in such a restricted area. You will need lots of open and unobstructed space for your first flys.
5. Properly take off
A.If you hand launch your airplane throw it hard and throw it straight ahead, not up.
B. If you take off from a ground roll let the airplane build up so much speed on the ground before you signal "UP" elevator, that you KNOW that the airplane has enough speed to fly. When it leaves the ground try to climb at a very small angle, not abruptly upwards which could CAUSE loss of airspeed and a stall.
C. Give very little UP elevator as your airplane starts to take off. Most beginning modelers try to climb too steeply which makes their airplane slow down, stall, then crash.
6. How to control turn during fly
A. You turn an airplane differently than a car or a boat: when you tilt the airplane’s wing in the direction that you want it to turn, the airplane will continue to turn as long as the wing is tilted in that direction. But you will NOT be holding the control stick in the direction of the turn (as you would on the steering wheel of a car) -- you will have the control stick near NEUTRAL during the turn. To STOP the airplane from turning you move the control stick in the opposite direction from the turn so that the wings level out. "Beginner's" airplanes have a built-in tendency to automatically come back to level fly if you let go of the control stick.
B. Don’t try any turns until the airplane is very high. Mostly climb straight ahead with only gentle turns.
C. Practice gentle turns high in the air before you try to land. Practice "landings" while high in the air so you get a good idea of the airplane's stalling (fall-out-of-the-sky) speed. If the airplane stalls Just give a bit of DOWN elevator and the airplane will be flying again.
D. avoid turns when the airplane is low.
7. Don’t try to land in a specific spot, Just let your airplane glide into the ground straight ahead. The bigger the field for your first fly, the greater will be your chances for success.Hope you can enjoy yourself with your rc plane!

Sambutan Jubli Emas Pemerintahan Sultan Kedah, Tuanku Abdul Halim Mu'adzam Shah hari ini diraikan segenap lapisan rakyat dalam suasana gilang-gemilang dan penuh tradisi Kesultanan Melayu.
Upacara kira-kira tiga jam itu bermula dengan perarakan diraja sejauh 3.2 kilometer bermula dari Wisma Darul Aman sehingga ke Balai Besar di depan Masjid Zahir di bandar raya ini.
Perarakan penuh warna-warni dan adat-istiadat itu turut dimeriahkan dengan perbarisan 10,000 murid sekolah di bahu jalan bermula dari persimpangan Wisma Darul Aman menuju ke persimpangan Jalan Putra.
Sultan Kedah diputerakan pada tanggal 28 November 1927 dan menaiki takhta kerajaan negeri Kedah Darul Aman pada 15 Julai 1958 setelah ayahanda baginda, Almarhum Sultan Badlishah mangkat.
Pada 20 Februari 1959, baginda ditabalkan secara rasmi sebagai Sultan Kedah ke-28 dan Tuanku Bahiyah Tuanku Abdul Rahman ditabalkan secara rasmi sebagai Sultanah Kedah dalam satu istiadat gilang-gemilang di Balai Besar di sini.
Hari ini, genap 50 tahun pemerintahan baginda di bumi Kedah Darul Aman dan pelbagai acara diatur bagi memeriahkan lagi sambutan itu.
KUALA LUMPUR – Juara bertahan, Kedah yang bermain dengan berat hati kerana menangisi pemergian Datuk Ahmad Basri Akil ke Rahmatullah masih mampu mencipta kemenangan dalam saingan Kumpulan B Piala Malaysia di Stadium Darul Aman, semalam.Dikejutkan dengan kematian tokoh bola sepak terkemuka negeri itu yang meninggal dunia pada pukul 2.30 petang, Kedah terpaksa mematuhi jadual yang telah diatur sebelum menang 5-1 ke atas Sabah.
Gol-gol Kedah dijaringkan Marlon James (m-7, 34), Cornelius Huggins (m-10) dan Fadly Baharom m-43, 45) manakala gol tunggal Sabah dijaringkan David Njoku (m-26).
Kemenangan itu membolehkan Kedah mencerahkan peluang ke suku akhir dalam usaha mereka untuk meraih kejuaraan ketiga musim ini selepas kejayaan menjuarai Piala FA dan juara Liga Super.
Polis Diraja Malaysia (PDRM) kekal sebagai pendahulu Kumpulan B tetapi memiliki 15 mata sama dengan Kedah selepas sekadar mampu seri 0-0 dengan Kuala Lumpur di Stadium Majlis Perbandaran Selayang.
SERI KEMBANGAN - KOSMO 05/07/08
Tindakan dua lelaki bersenjata parang untuk merompak sebuah salon di Jalan SP 2/2, Serdang Perdana berhampiran pusat membeli-belah South City Plaza di sini membawa padah apabila salah seorang daripada suspek itu cedera ditembak.
Dalam kejadian pukul 4.45 petang, kedua-dua suspek terbabit tidak menyangka salah seorang pelanggan di dalam salon itu adalah seorang anggota polis.
Jurucakap polis berkata, kedua-dua suspek yang menyerbu masuk ke premis tersebut terus menuju ke arah anggota polis berkenaan yang menunggu giliran untuk menggunting rambut.
"Salah seorang suspek terus merampas telefon bimbit dan dompet milik anggota polis yang mengandungi wang RM400,'' kata beliau.
Dalam masa sama, menurut beliau, seorang lagi suspek menyamun seorang lagi pelanggan sebelum dia menuju ke kaunter salon berkenaan.
"Melihat tindakan dua lelaki itu, anggota polis yang berpakaian preman dari balai Seri Kembangan itu kemudian memperkenalkan diri sebagai polis tetapi tidak diendahkan.
"Sebaliknya, kedua-dua suspek cuba menyerang anggota berkenaan menyebabkan anggota polis tersebut melepaskan tiga das tembakan,'' kata beliau.
ITULAH BENGONGNYA SEORANG PENYAMUN, NAK SAMUN TAK PILIH ORANG.... SAMUN POLIS... KAN DAH KENA TEMBAK... NASIB TAK MATI.... TAHNIAH POLIS.... POLIS YANG KENA SAMUN TU MY FRIEND
